
Lamp Shades: How to attach a lamp shade to a lamp
Search
See also our main lamp shade article for more lamp shade topics.
How to attach a lampshade

A replacement lampshade always breaths new life into a lamp or light fixture. A fresh and clean new look can revitalize a lamp. Lamp shades are designed to be fairly easy to replace in just a few steps. Here's how.
Disconnect the power and let it cool off
For your safety, at the very least turn off the lamp or fixture. If the lamp itself has a switch on it, such as on the cord or socket, by all means turn this off. But it's also better to turn it off at the wall if possible, and even better to unplug it if you can.
If there's a separate wall switch or power-strip switch, turn that off as well. If you can, unplug the lamp from the socket. While this is not totally necessary in order to change the lamp shade, you might be working close to the light bulb and socket which does bring with it some risk of electrical shock if you were to touch it. So it's better to take precautions.
Beware of hot light bulbs and fittings
If the lamp or fixture has been switched on for a while, the light bulbs might be hot to the touch. If you're going to need to be removing the bulb, adjusting a harp or handling the lamp shade, it's possible that these parts of the lamp may have heated up as well while the lamp was switched on. Especially when they're made of metal. You may want to give it half an hour perhaps to let everything cool off so that you don't burn your fingers.
Identifying the type of fitter

How you'll remove the shade depends on how it is attached to the lamp or fixture. Lamp shades use a few different types of fitters and ways of fastening to the lamp. You'll first want to identify how the shade is attached.
Spider fitters

To identify if your lamp us using a spider fitter, look at the top of the lamp shade. See if there are metal bars which join to the top rim of the shade and extend inward towards the center.
In the middle there should be a flat ring and a small knob or decorative item on top of it fastening it in place. Typically the metal rods go straight across but sometimes they dip down a few inches. You'll want to see that the rods meet in the middle, but above the light bulb.
The spider fitter will also be sitting on top of a lamp harp. The harp is made of a saddle which sits below the bulb. Two metal rods which rise up around the sides of the bulb meet at the top and have a screw threaded post on top, which the lamp shade spider fitter is resting on top of.
If you don't see the rods meeting in the center above the bulb, and the harp coming up around the bulb to meet above the bulb yet below the fitter, then your lamp might not be using a spider fitter lamp shade.
Uno fitters
An uno-fitter lampshade is a little different. The fitter is an all-in-one piece as part of the lamp shade frame. Look to see if rods are coming out from the inside top rim of the lamp shade toward the center.
Instead of seeing them go straight across to meet in the middle, the rods should proceed several inches downward and meet directly below the light bulb or near the socket. There won't be a separate harp fitter that the shade sits on, and there won't be a finial screwed in above the light bulb.
The uno fitter attaches typically below the light bulb socket, often with a thicker metal ring which has a screw thread inside of it. There should be direct single-piece rods which run from where it attaches to the lamp base all the way to the top edge of lamp shade. There should be no other metal parts above the light bulb.
Downbridge uno fitters
The only case where this might be different is if you are dealing with a light fixture or lamp which has a downward facing bulb. In this case the rods from the shade will likely move across horizontally and meet at what seems to be above the light bulb socket.
It will in this case look similar to a spider fitter, but there won't be a finial to screw the down-bridge uno fitter into place. Like other uno fitters it will be screwed or held onto the light fixture socket directly and rods will travel from there all the way to the edge of the lamp shade as part of the lamp shade frame.
Clip-on fitters

Clip-on lamp shade fitters only apply to small lamp shades. Larger lamp shades are too heavy and cumbersome to be clipped directly onto the light bulb.
It's easy to tell if your shade is the clip-on type. Simply look at the light bulb. If the metal bars from the top of the lamp shade are moving down around the bulb and literally are making contact with the outside surface of the light bulb itself, as if gripping onto the bulb, then you have a clip-on lamp shade.
There should be a clip "loop" on one side of the bulb and another on the opposite side. The metal rods or wires which form the fitter and the clip are generally much thinner and more flexible than those of larger lampshades. This flexibility allows it to have some spring-loaded force which holds it onto the light bulb.
Clip-on shades are typically only used for either very small lamps or for individual light bulbs on a large chandelier light fixture. Sometimes called candelabra shades, these mini lamp shades feature either a clip that clips onto a rounded Edison style rounded light bulb, or a longer clip which clips onto the more elongated candelabra "candle" bulbs.
Either way the lamp shade is very simply clipped on and can be easily removed. There should be no sign of a spider fitter, uno fitter, or harp involved.
Removing the old lamp shade
Removing a spider-fitter lamp shade
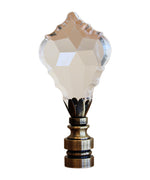
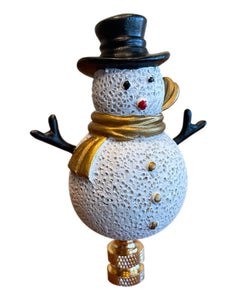
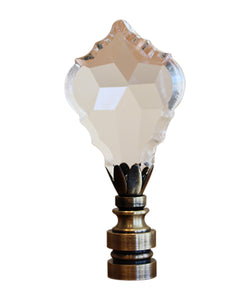
First locate the finial. It's a small object, at least the size of a finger-tip thimble, but possibly larger if it is more decorative, but no more than a few inches. The finial is located on top of the lamp in the middle center.
The finial is attached by being screwed onto the harp of the lamp. Hold the harp gently with one hand while twisting the finial gently with the other. The finial should unscrew, and when completely unscrewed, can be placed to one side.
When the finial is removed, the lamp shade should be free to be lifted away. You can gentle hold it - perhaps by the metal rods of the fitter near the top - and lift it upwards until it is clear of the lamp.
You should be left with the lamp base and harp. You're ready to perform any maintenance on the lamp base, or to go ahead and add a lamp shade back - be it the old one or a replacement shade.
Removing an uno-fitter lamp shade
To remove an uno fitter, you need to first let the light bulb cool off. Then you should remove the light bulb from the socket. It's important to turn the electrical supply off and ideally unplug the lamp before doing this, for safety. Removing the bulb should free up the uno fitter to be removed.
If the shade has a threaded uno fitter, the uno fitter is screwed onto the socket. This means the fitter needs to be rotated in order to unscrew it. Since the fitter is a part of the lamp shade itself, this means the whole lamp shade needs to be rotated in order to unscrew it from the socket.
Take care to gently grip the shade, preferably closer to the center by holding the metal rods of the uno fitter itself. If you grip and pull from the outer edge of the lamp shade, you risk bending the rods and breaking the frame. With the other hand, grip the socket of the lamp or fixture - making sure the power is off first.
Twist the shade to loosen the screw thread. Once you've turned the shade enough times to free it from the socket, you can lift the shade away. Then you can perform any maintenance on the lamp before replacing the shade or adding a new shade in its place.
Removing a clip-on lamp shade

Clip-on lamp shades are easily removed and replaced, but you should take some care to make sure you do not damage the light bulb. The clip should be a fairly thin metal which is fairly springy, though not intended to be bent heavily.
The clip can be easily pried apart with your fingers, just enough to free it from the bulb. But be careful that you do not allow the clip to snap back into place against the surface of the bulb, which could break it.
First allow the light bulb to cool so that you don't burn your fingers on the hot bulb or the heated fitter. Then gently grasp the fitter, ideally on both sides of the bulb with two hands, and pull it gently away from the bulb out to the sides. When it has cleared the bulb surface, lift it away gently.
Remember the fitter is part of the lamp shade frame so as soon as you've loosened its grip on the bulb you can slowly slide the whole shade up and away. Take care not to bump or hit the bulb while you do this.
Preparing to replace the shade
Before you replace your lampshade or install a brand new one, having the lamp shade removed from the lamp or fixture provides an opportunity for some maintenance.
At the least, consider dusting off the lamp base and the light bulb. Dust can accumulate on the bulb and lead to burning smells when the lamp is on.
A lamp base can look more attractive if it has reflective properties when cleaned. Some light cleaning of the lamp base and shade may be in order.
If you have a new replacement lamp shade, you might like to try putting it onto the lamp first before you fully unwrap it. If the shade comes in a plastic wrap, it's likely that the supplier would need this to remain intact if you were to return the shade.
You can install the shade onto the lamp with the plastic-wrap still intact to see how the shade looks, and whether it fits. Then you can remove the wrapping later.
Attaching the new lamp shade
To install the replacement lampshade, simply reverse the steps outlined above.
For a spider-fitter, lower the shade onto the harp post and then screw-on the finial to hold it in place.
For an uno fitter, slot the fitter into position and if necessary screw it onto the socket before replacing the light bulb.
For clip-on shades, simply pry the clip apart and clip it gently onto the bulb and then straighten the shade.
Continue reading about lamp shades
Using lamp shades with light fixtures
How to attach a lamp shade to a lamp
How to measure lamp shades for a perfect fit
Matching a lamp shade to your lamp base
Lamp shade materials colors textures and patterns
Light bulb heat and lamp electrical safety tips
How to clean and repair lamp shades
How to create a custom DIY lamp shade
Explore Topics

Table of Contents
Lamp Shades: How to attach a lamp shade to a lampHow to attach a lampshadeDisconnect the power and let it cool offIdentifying the type of fitterRemoving the old lamp shadePreparing to replace the shadeAttaching the new lamp shadeContinue reading about lamp shadesCommentsShopping Ideas
Trending



















Comments