
Lamp Shades: How to create a custom DIY lamp shade
Search
See also our main lamp shade article for more lamp shade topics.
Design and customize your own lamp shade
Creating a custom DIY lampshade is an excellent way to personalize your space. With endless options for fabric, trim, paint, and accessories, you can turn an ordinary lamp into a unique decor piece.
Whether you want to revamp an old shade, reuse a lampshade frame, or make something entirely new, this guide will walk you through the steps, offering creative tips and ideas along the way.
A lampshade plays more than just a functional role by softening light. It also contributes to the aesthetics of your room. With a bit of effort, you can turn an otherwise plain lamp into a conversation piece.
Let’s get started on this fun and rewarding project!

Materials You’ll Need for Your DIY Lampshade
Before you dive into your project, it’s important to gather all the necessary tools and supplies. Having everything at hand will make the process smoother and ensure the best results.
Basic Tools and Supplies
- Lampshade frame or an existing fabric lampshade to revamp
- Fabric (cotton, linen, canvas, or lightweight material works best)
- Hot glue gun or fabric glue for attaching materials
- Scissors or rotary cutter for precise cuts
- Measuring tape or ruler to measure fabric dimensions accurately
- Binder clips or clothespins to hold fabric in place while working
- Double-sided tape for additional hold (optional)
- Spray adhesive for smooth and even application
- Needle and thread (for sewing, if necessary)
- Decorative items like ribbons, tassels, beads, and pompoms for accessorizing
Additional Creative Supplies
- Fabric paint or dye for custom color designs
- Wallpaper, wrapping paper, or printed fabric for unique patterns
- Lace, mesh, or sheer fabric for an elegant, layered look
- Pompom fringe, tassels, or beads to create a playful or boho vibe
- Twine, rope, or natural fibers for a rustic feel

Step 1: Decide on Your Lampshade’s Look and Style
Think about what kind of atmosphere or mood you want your lamp to create. Your lampshade can complement your room's decor, stand out as a statement piece, or reflect a specific design theme.
- Classic style: Choose neutral-colored fabrics or subtle patterns that blend into your room seamlessly.
- Boho or rustic style: Use natural materials like twine or lace, and look for earthy tones or textured fabrics.
- Modern and minimal: Opt for geometric patterns or sleek, solid colors for a clean and contemporary look.
- Whimsical and playful: Use bright colors, pompoms, and tassels for a fun, energetic vibe, great for kids’ rooms.
- Vintage charm: Incorporate floral prints, lace trims, or fringe to give your lampshade an old-world elegance.

Step 2: Preparing Your Lampshade Base
You can start with either a metal lampshade frame or reuse an old fabric-covered shade. Each approach requires some preparation to ensure your new design works perfectly.
Using a Bare Lampshade Frame
- Check the frame for any rust or dirt. Wipe it clean with a damp cloth to ensure the glue adheres properly.
- If the frame feels unstable or wobbly, use pliers to tighten any loose joints or bends.
- Decide if you want to wrap the entire frame with fabric or leave some metal parts exposed for a minimalist design.
Reusing an Old Fabric Lampshade
- If you plan to re-cover an existing lamp shade, carefully remove the old fabric with scissors or a seam ripper. Try not to damage the frame underneath. Otherwise you can apply decorative elements while keeping the existing shade materials.
- Wipe off any leftover glue or residue with rubbing alcohol or soapy water.
- If the old fabric is still in good condition, consider using it as a template for cutting your new fabric, or decide whether to simply keep the existing materials.

Step 3: Measuring and Cutting Your Fabric
Accurate measurements are essential for a snug, wrinkle-free finish. Use a measuring tape to determine the circumference and height of your lampshade frame or shade. Note that a drum/cylinder shade may be a lot easier to cut for than a bell or empire shade.
- Add 1 inch (2.5 cm) to the height and width of the fabric for seam allowances.
- If you’re using a fabric with a bold pattern, align the design carefully before cutting to avoid misalignment.
- Use a rotary cutter for precise cuts, especially if you have multiple pieces to prepare.

Step 4: Attaching the Fabric to Your Frame or Shade
Option 1: Wrapping Fabric Around a Lampshade Frame
- Apply a thin line of hot glue along one rib of the frame.
- Press the edge of the fabric onto the glued section, smoothing it out as you go. Use binder clips to hold it in place while the glue dries.
- Work your way around the frame, applying glue in sections and wrapping the fabric tightly to avoid wrinkles.
- Fold the excess fabric over the top and bottom edges of the frame, securing it with more glue for a clean finish.
Option 2: Covering an Existing Fabric Shade
- Spray a light coat of adhesive over the old lampshade surface.
- Wrap your new fabric around the shade, smoothing it out as you go to avoid bubbles or wrinkles.
- Glue the edges inside the top and bottom rims for a polished look.
- Use clothespins or binder clips to hold the fabric in place while the glue sets.

Step 5: Decorating with Trims and Accessories
Once your fabric is securely attached, it’s time to add decorative elements to make your lampshade truly unique.
- Ribbon Trim: Attach ribbon along the top and bottom edges for a clean, finished look.
- Pompom Fringe: Add playful pompom fringe to the bottom edge for a whimsical touch.
- Tassels: Glue tassels along the rim for a bohemian vibe.
- Lace Overlay: Layer lace over the fabric for a romantic, textured look.
- Twine Wrap: Wrap twine or rope around the frame to give it a rustic, handmade feel.
Step 6: Painting or Stenciling Designs
Painting or stenciling on your lampshade allows you to customize the design even further. You can add geometric shapes, floral patterns, or even metallic accents for an eye-catching effect.
- Choose fabric paint or mix acrylic paint with fabric medium.
- Use a sponge or stencil brush for applying the paint evenly.
- Apply paint in thin layers, allowing each layer to dry before adding another.
- Use painter’s tape to secure stencils in place while you work.

Step 7: Optional – Add Light Diffusers or Filters
- Sheer Lining: Add a second layer of sheer fabric to create a soft, diffused glow.
- Colored Lining: Use bold-colored fabric on the inside for a unique lighting effect.
- Paper Diffuser: Attach a paper or plastic diffuser to spread the light evenly.
Note you should make sure that any materials on the inside of the lamp shade will be exposed to heat from the light bulb. As materials warm up such as glues or tapes they may become unstuck and become a fire hazard. Make sure all elements are firmly secured to the lamp shade and won't easily come apart.
Step 8: Testing and Final Adjustments
Once your lampshade is complete, attach it to the lamp base and switch on the light. Check for any loose areas that may need extra glue. Ensure the fabric does not touch the bulb to prevent overheating.
Safety Tips:
- Use LED or low-wattage bulbs to reduce heat.
- Ensure that all glued seams are secure to avoid the fabric peeling off over time.
- Keep an eye on any added embellishments, like beads or tassels, to ensure they don’t come loose over time or get too close to the bulb.

Creative Ideas for Customizing Your Lampshade
Feeling adventurous? Here are more ideas to make your lampshade a unique piece that reflects your personality and creativity.
- Seasonal Themes: Create lampshades for specific holidays or seasons. Use reds and greens for Christmas, pastels for spring, or warm tones for fall.
- Nature-Inspired Design: Choose fabrics with floral, leaf, or tree prints. Add faux flowers or leaves along the rim for an earthy touch.
- Vintage or Retro Look: Use antique lace, fringe, or retro fabric patterns to capture an old-school vibe.
- Kids' Room Delight: Cover the shade with cartoon fabrics, animal prints, or glow-in-the-dark paint to create a fun atmosphere for children.
- Multi-Panel Design: Use several pieces of different fabrics to make a patchwork or multi-patterned lampshade.
- Personalized Shades: Add embroidered initials, family photos, or favorite quotes to give your lamp a personal touch.
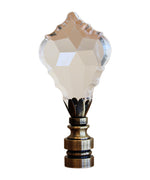
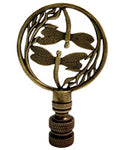
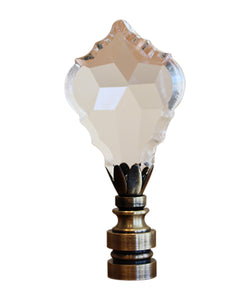
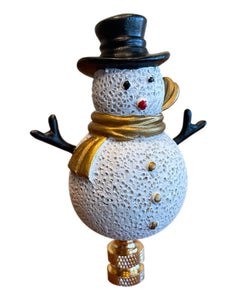
- Use a finial: Lamp finials sit on top of a harp fitter to attach a spider-fitter shade to a lamp. Decorative finials can be easily swapped out at various times of the year to liven up your lamp.

Enjoy Your New Custom Lampshade!
Creating your own custom DIY lampshade is not only a great way to express your creativity but also an eco-friendly option to upcycle old materials. Whether you’ve chosen a classic design with fabric or gone all out with paint, tassels, and ribbons, the result will be something truly one of a kind.
The beauty of this project lies in its flexibility. You can experiment with fabrics, textures, and decorative elements to suit your mood, decor style, or the season. Plus, this process is beginner-friendly and requires minimal tools, making it accessible to anyone, even if you’ve never tried DIY projects before.
Now that your custom lampshade is complete, sit back, switch on your lamp, and admire your handiwork. You’ve just transformed an ordinary object into a unique decor piece that reflects your personal style and adds a warm glow to your space. Happy crafting!
Continue reading about lamp shades
Using lamp shades with light fixtures
How to attach a lamp shade to a lamp
How to measure lamp shades for a perfect fit
Matching a lamp shade to your lamp base
Lamp shade materials colors textures and patterns
Light bulb heat and lamp electrical safety tips
How to clean and repair lamp shades
How to create a custom DIY lamp shade
Explore Topics

Table of Contents
Lamp Shades: How to create a custom DIY lamp shadeDesign and customize your own lamp shadeMaterials You’ll Need for Your DIY LampshadeStep 1: Decide on Your Lampshade’s Look and StyleStep 2: Preparing Your Lampshade BaseStep 3: Measuring and Cutting Your FabricStep 4: Attaching the Fabric to Your Frame or ShadeStep 5: Decorating with Trims and AccessoriesStep 6: Painting or Stenciling DesignsStep 7: Optional – Add Light Diffusers or FiltersStep 8: Testing and Final AdjustmentsCreative Ideas for Customizing Your LampshadeEnjoy Your New Custom Lampshade!Continue reading about lamp shadesCommentsShopping Ideas
Trending
















Comments