

Light Bulbs: How to safely screw in various kinds of light bulbs
Search
Main Article: Choosing the Right Light Bulb: Everything you Need to know
How do you screw in a light bulb?
Whether you're a DIY enthusiast or just looking to brighten up your space, this guide will help you understand how to safely and correctly change out your light bulbs. As an initial tip, if the light bulb you're removing has been switched on for a while, it's best to switch it off and let it cool. The bulb surface can be quite hot and you don't want to burn your fingers. Alternatively use a dry cloth, towel or similar as a buffer so that you can grip the bulb gently without burning yourself. Never directly touch a hot bulb.
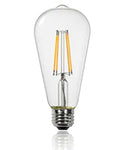
Edison Screw Base (E)
The Edison screw base, often referred to by its E26 for North America and E27 for Europe, is characterized by its cylindrical shape with spiral threads. The base is typically made of metal and has a smooth, shiny finish. It features a slightly tapered end that fits snugly into the socket. The bulb itself usually has a rounded shape, but variations exist, including globe, candle, and standard bulb shapes. The size and threading of the base make it one of the most recognizable bulb types, commonly used in household light fixtures.
How to install an Edison bulb
To install an Edison screw bulb, start by switching the power off. This is a crucial safety step to prevent any electrical accidents. Then take the bulb and hold it near to the base, but away from the metal part. Avoid contact with the main glass portion to minimize the risk of breakage. Align the base of the bulb with the socket, ensuring that the threads fit together properly. Once aligned, gently twist the bulb clockwise until it feels snugly fitted into the socket. It’s important to apply a firm but gentle pressure; avoid over-tightening, as this can damage both the bulb and the socket. Then turn the power back on at the switch and check if the bulb lights up. If it doesn’t work, double-check to ensure that the bulb is properly seated and that the fixture has power.
Bayonet Base (B)
The bayonet base, designated as B22, features a cylindrical design with two metal pins located on opposite sides of the base. These pins are slightly protruding and designed to fit into corresponding slots in the socket, allowing the bulb to twist and lock into place. The base is typically made of metal and has a smooth, shiny surface. The bulb itself can come in various shapes, including standard, globe, and decorative styles, but the defining feature is the secure locking mechanism that differentiates it from screw bases.
How to install a Bayonet bulb
To install a bayonet bulb, first turn off the power to the fixture. Then take the bulb and hold it by the glass part, making sure not to touch the base if it has been previously used and might be hot. Position the bulb over the socket and align the pins with the corresponding slots. Gently push the bulb into the socket while twisting it clockwise. You should feel a slight click as the bulb locks into place, which indicates that it is secured properly. Make sure it is firmly in position, as a loose connection may result in flickering or failure to light. Then restore power to the fixture and test the bulb to ensure it operates as expected.
Bi-Pin Base (G)
Bi-pin bases, such as G4 and G5.3, are compact and feature two metal pins that protrude from the base of the bulb. The distance between the pins varies based on the design, with G4 pins spaced 4 mm apart and G5.3 pins spaced 5.3 mm apart. The base is usually cylindrical and designed to fit snugly into the socket by pushing the pins into the corresponding holes. The bulbs themselves are often cylindrical or capsule-shaped and can be found in applications such as under-cabinet lighting and decorative fixtures.
How to install a Bi-Pin bulb
Installing a bi-pin base bulb requires careful handling to ensure that the pins are aligned properly. First, make sure to turn off the power to the fixture. Then take the bulb and hold it by the glass portion to avoid applying pressure on the pins, which can cause them to bend or break. Align the two metal pins on the base of the bulb with the corresponding holes in the socket. Gently push the pins into the holes while maintaining a straight line, as angling the bulb can result in misalignment. Once the pins are securely seated, you may twist the bulb slightly to ensure it is locked in place. Then turn the power back on to the fixture and check to see if the bulb lights up correctly.
Candelabra Base (E12)
The candelabra base, designated as E12, is smaller than the standard Edison screw base, with a diameter of 12 mm. It features a metal screw design similar to the E26/E27 bases but is more delicate and slender. The bulb itself can come in a variety of shapes, including candle-like designs and decorative styles, often used for chandeliers, sconces, and accent lighting. The candelabra base provides an elegant look, making it popular for decorative fixtures in homes and businesses, although they tend to be of a lower wattage/brightness than other bulbs.
How to install a Candelabra bulb
When installing a candelabra bulb, begin by turning off the power. Then hold the bulb by the glass portion, taking care not to touch the base. Align the screw threads of the bulb with the socket. Gently insert the base into the socket, and twist it clockwise until you feel it secure into place. It’s essential to avoid over-tightening, as this could lead to damage to both the bulb and the socket. Then restore power to the fixture and test the bulb to ensure it lights up as expected. If it doesn’t illuminate, check that it is firmly seated and that the fixture has power.
Medium Base (E14)
The medium base, designated as E14, measures 14 mm in diameter and features a similar screw design to the larger E26/E27 bases but in a smaller format. This base is commonly made of metal with a smooth finish, allowing for easy twisting into the socket. The bulbs can come in various shapes, including standard, globe, and decorative forms. The E14 base is often found in European lighting fixtures and is frequently used in chandeliers, pendant lights, and table lamps.
How to install a Medium Base bulb
To install an E14 bulb, first turn off the power. Hold the bulb by the glass section to avoid getting fingerprints on the base, which can impact its performance. Align the base with the socket and twist it clockwise until it is securely fastened in the socket. It’s important to make sure that it is snug but not overly tight, as this could cause damage. Then restore power to the fixture and check to see if the bulb lights up. If the bulb does not work, double-check to confirm that it is correctly seated and that power is reaching the fixture.
GU Base
The GU base, including types such as GU10, features two short pins that protrude from the base of the bulb and are designed to fit into a socket with corresponding holes. The pins are often slightly angled and designed for a snug fit. The base is cylindrical and typically has a smooth finish. GU bulbs come in various shapes, including floodlight and spotlights, commonly used in track lighting, recessed fixtures, and accent lighting. The distinctive pin design allows for easy installation and removal by twisting the bulb into place.
How to install a GU base bulb
Begin by turning the power off. This precaution is critical to avoid any electrical accidents. Next, hold the bulb by its body rather than the pins to prevent any accidental bending. Align the pins of the bulb with the holes in the socket. Gently push the bulb into the socket while twisting it slightly clockwise to lock it into place. You should feel it secure itself as the pins fit snugly into the holes. It’s essential to ensure that the bulb is properly seated, as a loose connection could lead to flickering or failure to light. Then turn the power back on to the fixture and test the bulb to ensure it is functioning properly.
R7s Base
The R7s base is unique, characterized by its long, cylindrical shape with two metal pins located at each end of the bulb. The pins are spaced a specific distance apart (often 78 mm or 118 mm) and fit into corresponding holes in the socket. The base is designed for linear fluorescent or halogen bulbs and typically has a clear or frosted glass bulb that can be tubular or elongated. This base type is commonly used in floodlights, work lamps, and other specialized lighting fixtures, providing a bright, focused light output.
How to install an R7s base bulb
Start by turning the power off. Then take the bulb and hold it by the glass portion. Align the pins on either end of the bulb with the holes in the socket. Push the bulb in gently, ensuring that it fits snugly. Be careful not to force it, as excessive pressure can damage the pins or the socket. After the bulb is fully seated, check that it is secure, as a loose connection may result in the bulb flickering or not lighting at all. Then restore power to the fixture and test the bulb to ensure it lights up correctly.
Xenon Bulbs
Xenon bulbs can come in various base types, but common configurations include bi-pin bases similar to G4 and G5.3. The base features two metal pins that protrude from the bulb, allowing it to connect securely to the socket. Xenon bulbs typically have a clear or frosted glass design, providing bright and efficient illumination while producing less heat compared to traditional incandescent bulbs. These bulbs are often used in decorative lighting, accent lighting, and some types of vehicle headlights.
How to install a Xenon bulb
Start but turning off the power. Then hold the bulb by its glass portion to avoid applying pressure on the pins. Align the two metal pins on the base of the bulb with the corresponding holes in the socket. Gently push the pins into the holes while keeping the bulb straight, as misalignment can cause damage. After the pins are securely seated, you may twist the bulb slightly to ensure it locks into place. Then turn the power back on to the fixture and test the bulb to confirm that it operates correctly.
Light Bulb Safety First
If you ever find yourself uncertain about which type of light bulb or socket is right for your needs, or if you’re uncomfortable with the installation process, it's always a good idea to consult with a professional electrician. They can provide valuable guidance on selecting the appropriate bulbs and ensuring safe installation.
Always make sure to keep fingers away from the light socket and never put your fingers inside or onto the metal of the socket, as there is significant risk of electrical shock. Never poke anything into the socket. If the socket seems damaged it's best to consult with an experienced electrician before using it or trying to fix it. Always keep your fingers away from the metal base of the bulb as well, because as soon as it makes contact with the socket it could become electrically charged.
If it seems that you've done everything right and the bulb is installed but will not light up, it's possible that the bulb is blown, the filament is broken, or it may be defective. Check the bulb for signs of damage, burnout or other signs that it is past being useable. If in doubt, it may be better to buy a new bulb.
Learn more about Light Bulbs
The different types of light bulb technologies
Choosing the right light bulb base for the socket
How to safely screw in various kinds of light bulbs
The different shapes of light bulbs
Smart Bulbs, their benefits and features
How to find the brightness of a light bulb
The different colors of bulbs, warm white, cool white and more
What are Full Spectrum and Natural Daylight bulbs?
What is Color Rendering Index (CRI), and why does it matter
How to avoid glare and harsh light
Wattage, what is it and does it matter?
When light bulbs get hot take safety precautions
How long do they last and when will they need replacing
How much do they really cost to run?
Explore Topics

Table of Contents
Light Bulbs: How to safely screw in various kinds of light bulbsHow do you screw in a light bulb?Edison Screw Base (E)Bayonet Base (B)Bi-Pin Base (G)Candelabra Base (E12)Medium Base (E14)GU BaseR7s BaseXenon BulbsLight Bulb Safety FirstLearn more about Light BulbsCommentsShopping Ideas


Trending


Comments